Add Authorized Payer to Cashnet
A page within Cashier's Office
- Scroll down to the Finances section of your Student Center.
- Click the Grant Access to View/Pay Bill
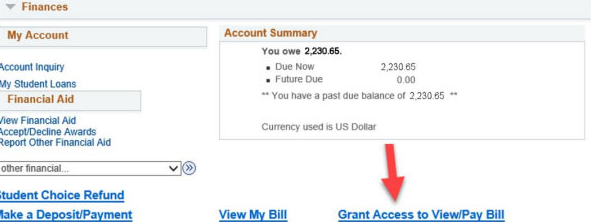 Screenshot of Student Center within Cashnet showing Grant Access button
 - A new window should pop up, click on My Account
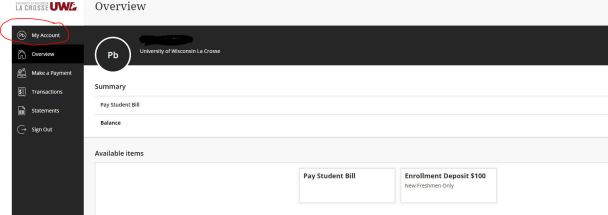 Screenshot of Cashnet Overview page with My Account button highlighted
 - Select Send Payer Invitation
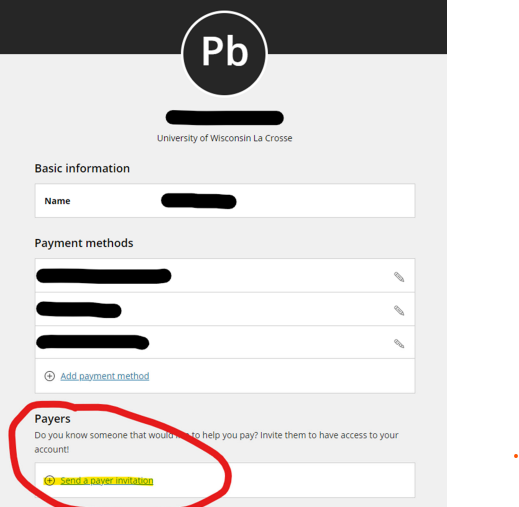 Screenshot of Cashnet Personal settings with Send payer invitation highlighted
 - Fill in First name, Last name, email address, confirm email address and add an optional message to the authorized payer. Then select “Send Invitation”
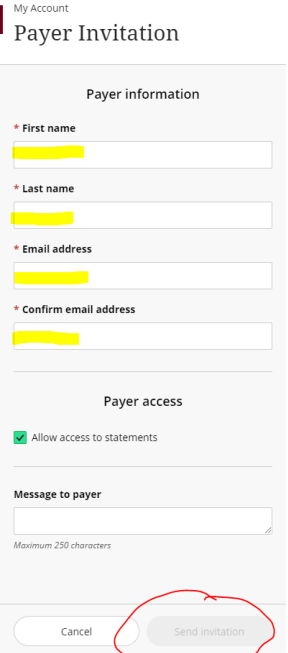 Screenshot of Cashnet with First name, Last name, Email address, confirm email address highlighted. Allow access is checked. and Send invitation is circled.
 - The Payer will receive an email with their username and their password with a link to log in to the system. If they need their password reset, the STUDENT will need to reset their password.